Export a dataset
You can begin exporting your dataset as soon as you have at least one approved item.
First you need to validate the dataset. To do this, go to the “More Actions” dropdown in the upper right-hand corner of the browser window. Select “Validate dataset”.
When you click this option, a drawer opens up explaining what the validation does. To validate the dataset, click the button in the drawer. You can refresh the page and check the timestamp of the most recent validation in the Dataset Metadata drawer to ensure that it has run properly.
Once the data is validated, you can export your dataset. From the “More actions” dropdown, select “Export dataset.” Click the export dataset button and wait for the job to finish. You can see the timestamp of the last export in the Dataset metadata drawer.
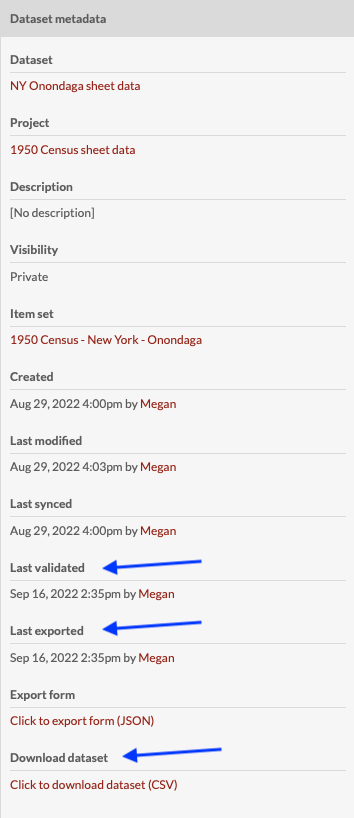
To access the export, use the “download dataset” link at the bottom of the dataset metadata sidebar.
If you click the link, it will open the csv data in your browser window. To save the file right-click or control-click and use your browser’s menu to save the linked file to your computer.
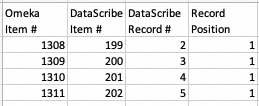
Note that every DataScribe export has columns for the Omeka item number, the DataScribe item number, the DataScribe record number, and the DataScribe record position.
Download this tutorial as a pdf.