Importing DataScribe data to Omeka S
For this process, you will need:
- a DataScribe project and dataset;
- the CSV Import module for Omeka S;
- an understanding of Omeka S items and resource templates.
Note This mapping process described here will only work when importing the exported data into the same Omeka S installation where the DataScribe transcription has taken place.
The screenshots in this example are primarily from 1950 Census data using the Census Sheet Data form (download json file), importing into items using the Census Items resource template (download json file). If you want to run a test using these resources, download the linked json files and a selection of pages from the 1950 Census website. Create a dataset with the form and transcribe at least three sheets (items).
Add exported data to existing items
The example in this tutorial has a one to one correlation between the record and the item; each item only generates one record.
Preparation
Be mindful of possible post-processing work when creating the guidelines and form.
In this example, transcribers are supposed to use the semicolon to separate the names of streets on each census sheet. This should allow us to use the “multi-value separator” option in the CSV import. However, there is of course the chance that a transcriber will forget and use a comma. For that reason you might want to use a more distinct separator or do manual separation before importing (see below).
Also make sure you have a template for incoming information, or at least you know what properties you want to use. For this example, we’ve created an extended census documents template with additional properties for all of the fields in the DataScribe form. Note that there is also a property in the template for the DataScribe item number.
Get and review CSV
In the dataset you’re using, go to the “More actions” dropdown in the upper right corner of the browser window.
First choose the “Validate export” option. Exports must be validated before they are run.
If the validation goes smoothly, re-open the “More actions” dropdown and select “Export dataset.” Once the export is complete, you can scroll down to the end of the right-hand drawer. Use right-click or a similar option on the “download dataset” link to save the csv file to your computer.
Open the csv file to ensure that it is complete and that all of the rows have the proper formatting.

The above image shows the export from DataScribe, modified with alternating colors for the rows for readability. Note the column with the Omeka S item identifier. The final column, Street names, has multiple values which are separated by a semicolon.
If you want to split the data in some of the rows into separate columns, you can do so here. Some csv reading software (Google Sheets, Excel) will split text into columns at specific punctuation marks. This is an alternative to using the multi-value separator option in the csv import. For the image above, we could split the street names at the semicolon.
Import
Start a new import with the CSV Importer and use your dataset export csv file. Set the import type to “Items.”
It is very helpful to add a comment saying what you are importing. Comments display in the Post Imports tab but filenames do not. An example would be “updating items with transcribed data from Dataset name, Project name.”
Map csv columns
When mapping columns to Omeka S data, it may be be useful to have written which column heading maps to which property in Omeka S for reference when setting these options. If you have created a template for the data, having the template open in another window or having a screenshot as reference is also a good choice.
If you decided to use the multi-value option, you will need to indicate that in the mapping options for that column. Click the wrench icon and ensure that the “use multivalue separator” box is checked.
Basic import settings
Bearing in mind that you are updating existing items, you can select a new resource template to use.
Be sure that the correct symbol is entered for the multi-value separator, if you are using one.
Advanced import settings
In the advanced settings tab, use the Import type dropdown to choose: “Append data to the resource: Add new data to the resource, based on an identifier for an existing resource. (Cannot be undone.)”
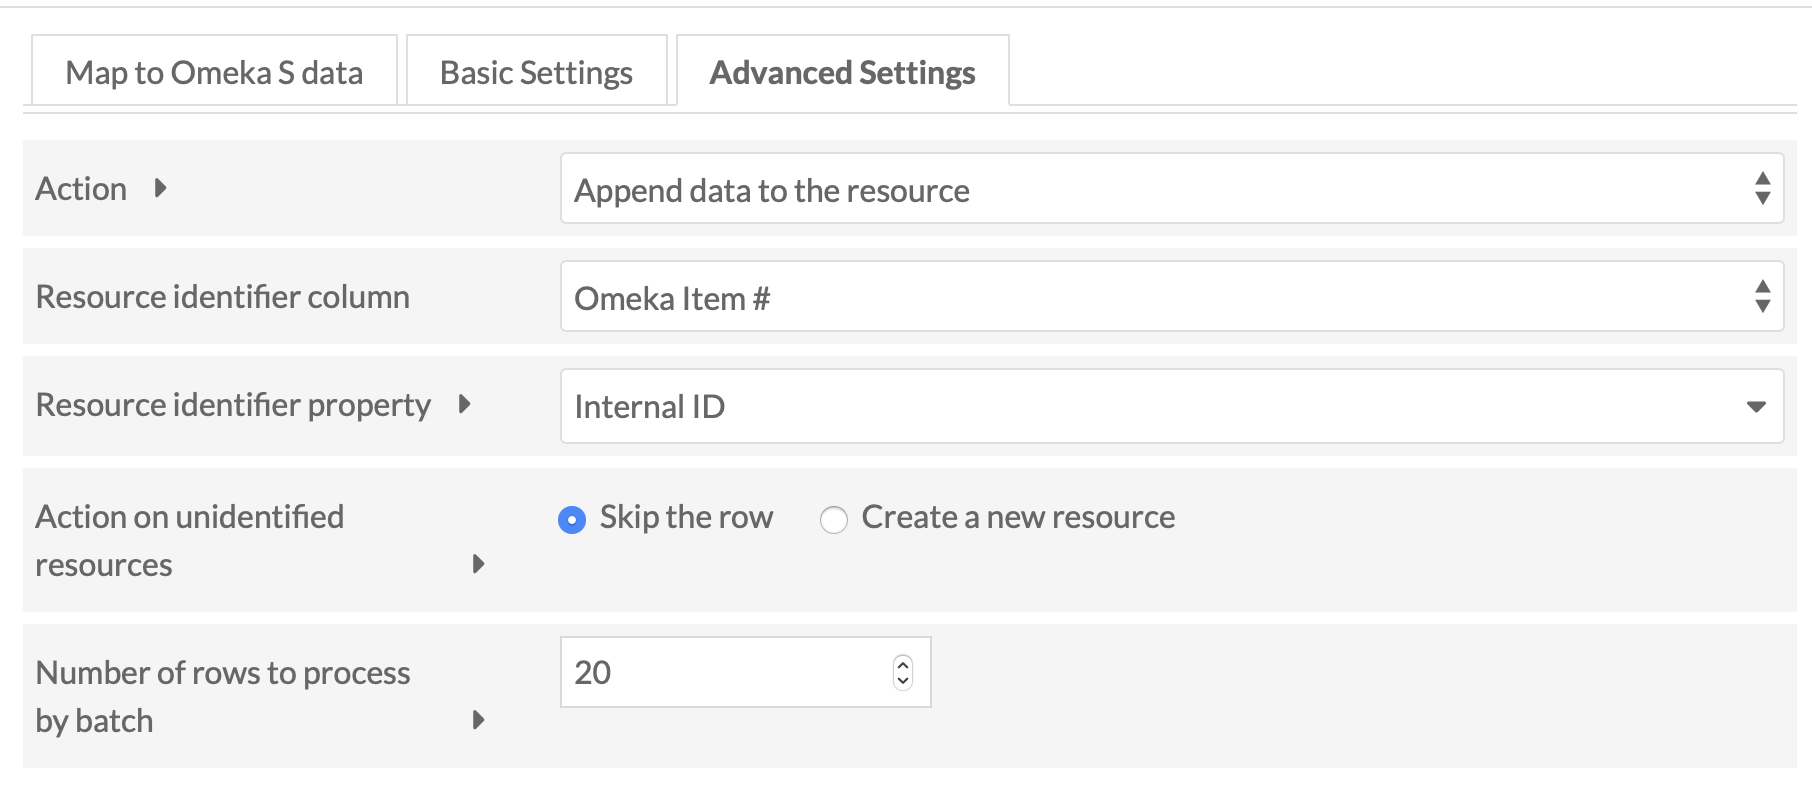
For the identifier column, chose the Omeka Item # column. This column is automatically created by DataScribe in the export. For the identifier property, choose “internal ID” (meaning the Omeka S item ID).
Verify the import
Once the import is complete, open at least one of the Omeka S items you know were part of the item set which populated the dataset. Check to make sure that the information has been properly mapped and imported.
Remember that if the import had errors you will have to manually remove the bad data. Imports which append data cannot be undone.
Screencast
Variations
In addition to updating Omeka S items with information, one row in the exported csv per Omeka S item, there are other possible approaches. These are suggestions about how you might modify the above tutorial to run these sorts of import updates.
These examples use transcription of The Liverpool Directory for the Year 1766, with a form that has fields for name, occupation, location, and location modifier.
Add multiple records to one item
This course of action should be undertaken only after serious consideration. If there are multiple rows per item and multiple fields in your form, you will lose the connection between the data in each row. However, you can use this to populate properties in the Omeka S item to create a sort of searchable index of content.
Follow the directions as given above, this time using a csv where there are multiple records per item.
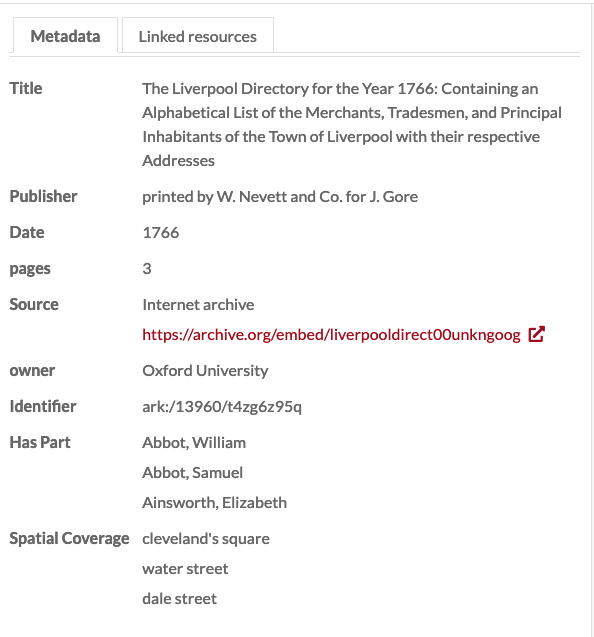
In this instance, we have imported the names and locations from the Directory into the properties “has part” and “spatial coverage”, respectively.

This image shows the mapping tab in the csv import module:
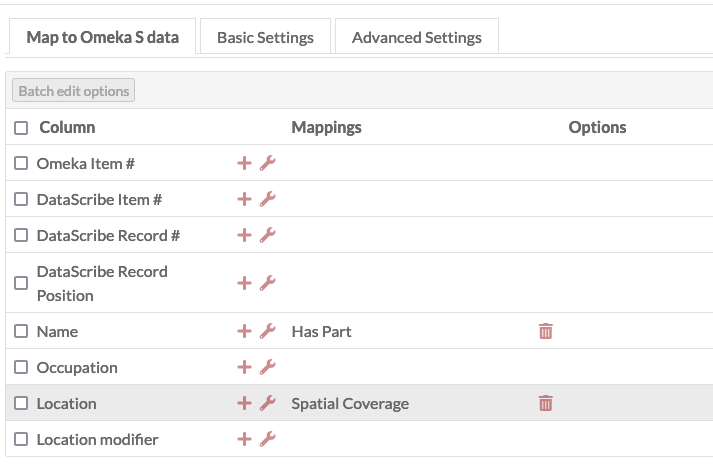
This shows how those rows have become inputs in the metadata of the original item. Note that there is no clear way to connect the peoples’ names with the street names.
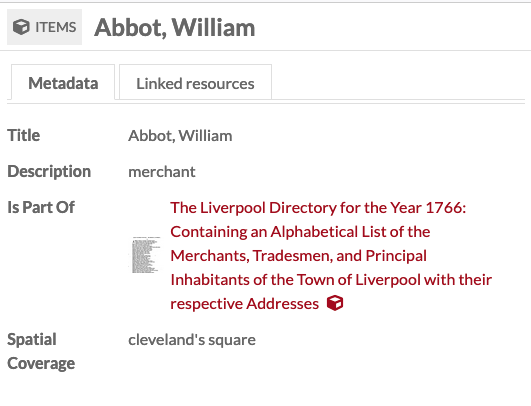
Add records as new items
If you wanted to create new items from your DataScribe export, you could modify the tutorial by taking the following steps:
In the Advanced tab, keep the option set to “Add new items”
Use the column
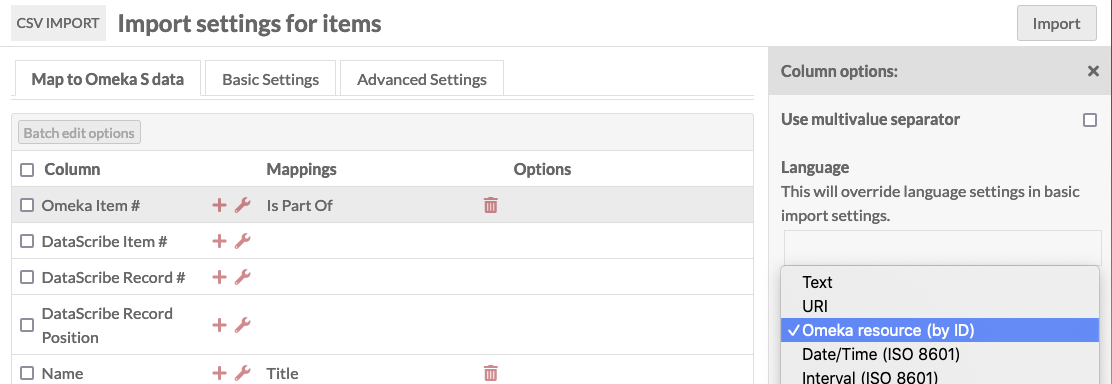
Omeka S Item #to create a link between the new item from the record to the existing item for the image transcribed:- Map the
Omeka S Item #column to a property likeIs Part Ofso that it will appear in the new item’s metadata. - Use the options for the mapping to set the data type to “Import as Omeka S resource ID”.
- Map the
In this example, the data has been imported as new items. The Omeka S Item # column has been mapped to Is Part Of and in the column options, the datatype has been set to “Omeka resource (by ID)”.
This import created three new items. As you can see from this item, created in the import, the Is Part of Property has for its value the Omeka item for the page on which this data appears in the original document.